Strict Standards: Only variables should be assigned by reference in /home/noahjames7/public_html/modules/mod_flexi_customcode/tmpl/default.php on line 24
Strict Standards: Non-static method modFlexiCustomCode::parsePHPviaFile() should not be called statically in /home/noahjames7/public_html/modules/mod_flexi_customcode/tmpl/default.php on line 54
Strict Standards: Only variables should be assigned by reference in /home/noahjames7/public_html/components/com_grid/GridBuilder.php on line 29
The battle of Word vs. Google Docs is usually over before it begins, with the spoils awarded to Microsoft’s venerable word processor and its huge feature set. But the size of the toolbox isn't always the best measure of a program’s usefulness, so we put the two to a more practical test.
Assuming 80 percent of people use 20 percent of a program’s features, we tasked both programs with a universal real-world use case: the creation of a simple resume. This gave us the chance to compare commonly used formatting tools such as headers, columns, and bullets, and level the playing field a bit. Here’s how each fared.
Google Docs: A few workarounds required
To really road test each program’s more basic capabilities, we wanted to create a new resume from scratch without the use of templates. To make the test more challenging, and add a little pizzazz to the final product, we decided on a two-column layout with the section titles on the left side and section content on the right.
This was a multi-page CV, which gave us a great opportunity to use a header: We wanted to make sure our name and contact info were on the top of each one in case the printed pages got separated by HR or the hiring manager. Google Docs’ header function is incredibly straightforward—just go to Insert > Header and type your text in the box that appears at the top of the first page. The same information will automatically appear at the top of all succeeding pages.
If for whatever reason you want different text on the first page, click the check box labeled “Different first page header/footer” on the lower left of the header box. That header text will be cleared so you can add new info. The headers of subsequent pages will remain unchanged.
With the headers set, it was time to dive into the meat of the resume. Google Docs doesn’t support multi-column layouts. As with many challenges with Google’s productivity suite, however, there is a workaround. In this case, you can simulate columns by using a borderless table.

You can simulate a multicolumn document in Google Docs using the Tables features.
To do this, place the cursor where you want to start your “columns” and go to Table > Insert Table. In the fly-out menu, drag your cursor across the grid to create the number of columns and rows you want. We wanted our resume divided into five sections—Summary, Skills, Experience, Education, and Awards—so we created a two-by-five table. You can just drag the cells by their outside borders to resize them. Then type your text (or cut and paste it from an existing document) into the appropriate columns.
With the content in place, you’ll next need to format it. Just right-click in the appropriate cell and select Table properties from the pop-up menu. Under Cell vertical alignment, select Top, Center, or Bottom. The text will maintain whichever alignment you choose even if you resize the cell it’s in.
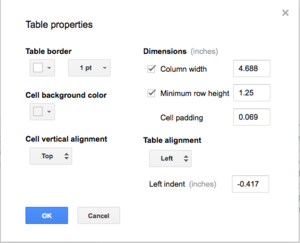
Docs table properties features are clean and intuitive.
From the Table properties menu, you can also set the dimensions and alignment for the tables and choose a background color for your cells, which we did for the left column to add a little pop.
From there it was a matter of choosing fonts, colors, and heading and bullet styles. Docs had more than enough options to experiment with.
Lastly, we wanted to get rid of the table's borders so it'd look like a set of true columns. To do this, go back to Table properties and change the Table border to 0 pt.
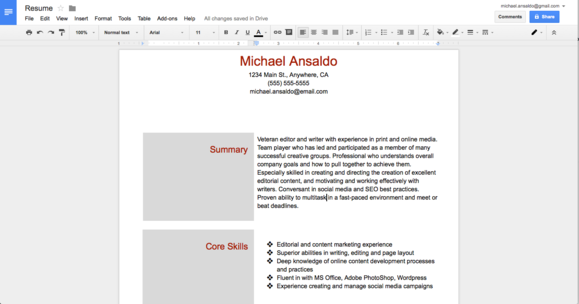
It won’t win any design awards, but this two-column resume was a breeze to create in Google Docs.
Creating a resume in Google Docs was shockingly easy—we banged it out in less than an hour. Not only did Docs have all the document formatting tools we needed, its simple interface saved us time because we didn’t have to hunt through multiple tabs and sub-menus to find them. If there’s one knock we can make on Google Docs, it’s that it still doesn’t support real columns. Though the tables workaround will produce multi-column documents when you want to control discrete blocks of text, it won’t be feasible when you want to flow text from one column to the next.
Microsoft Word: It's complicated
Creating our resume in Word, we ran into some frustration right out of the gate. Whereas Google Docs intuitively placed the Header feature under its Insert menu, Word treats headers and footers like they’re already present in a blank document. A quick help search reminded us they can be revealed from the View menu: View > Header and Footer.
On the other hand, Word gives you far more control over headers, with an entire ribbon of tools that let you add page numbers, date and time, and pictures, and designate on which pages it appears. It even offers around 20 header templates.
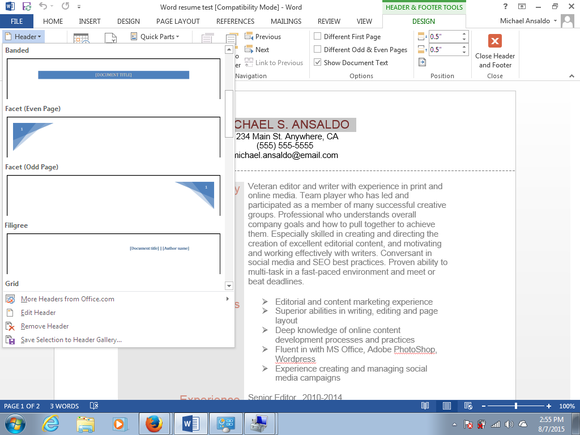
Microsoft Word’s predesigned headers offer plenty of options to make your document stand out.
Unlike Google Docs, Microsoft Word does have an actual column feature, which can be found under its Format menu. However, it’s designed to flow paragraph-heavy text from one column to the next, as you would in a newsletter for brochure. It’s less than ideal for something like a resume, which intersperses short blocks of text and bulleted lists. Because of that, we opted again to use tables to give us better control over the layout.
The first major difference you’ll notice from Google Docs is Word's head-spinning seven ways to create Tables, including drawing them freehand, and a couple that are relevant only if you’re importing Excel data. The Graphic Grid is the most straightforward method and the most similar to Google Docs tables function. You just click the table icon under the Tables tab. In the drop-down grid, select the number of rows and columns you want.
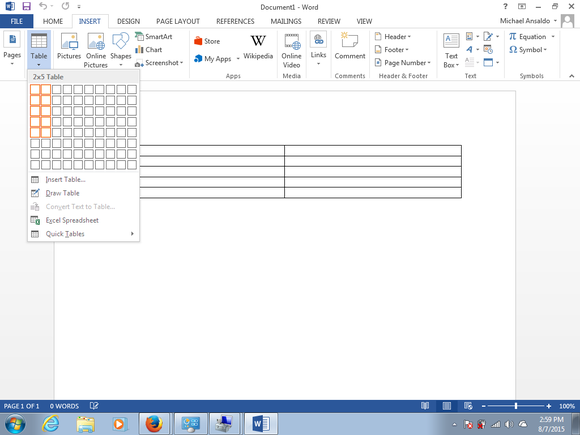
Word offers seven different ways to create tables, but using the Graphic Grid is the simplest.
Once you’ve entered text into the appropriate cells, you can format the table by right-clicking in a cell and selecting Table Properties. Where Google Docs contains properties like cell and column dimensions, alignment, and border to a single dialog box, Word spreads its options across five sub-menus, plus a separate menu with submenus just for borders and shading.
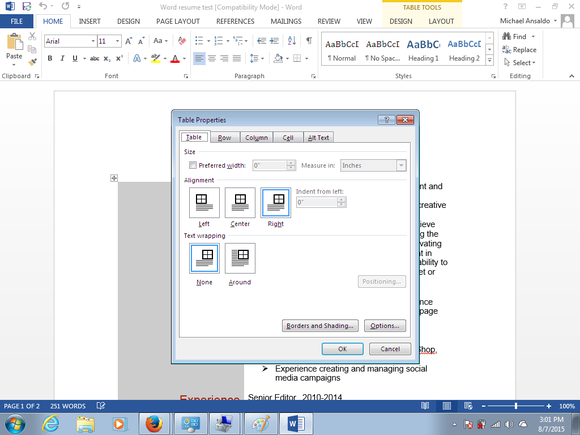
Word’s menus nested within menus often make it hard to find what you want.
This was a common theme as we continued to format the resume: though the basic features we used to create our document in Word mirrored those we used in Docs, we spent considerably more time finding them because they’re dispersed over a number of tabs, flyouts, and dialog boxes. So in the end, we used exactly the same steps to create the resume as we did in Docs, but it took us longer to do it.
The verdict: Less is more
There’s no question Microsoft’s steadfast word processor would win a feature-by-feature smackdown with Google Docs, but more tools doesn’t necessarily translate into a better user experience. When it comes to the basic formatting tools we use to create documents every day, we can’t find an overwhelming advantage over Docs. If anything, Google’s word processor has the edge when it comes to ease of use, thanks to its simple, intuitive interface. So unless you’re a power user, this is a case where less is definitely more.
Strict Standards: Only variables should be assigned by reference in /home/noahjames7/public_html/modules/mod_flexi_customcode/tmpl/default.php on line 24
Strict Standards: Non-static method modFlexiCustomCode::parsePHPviaFile() should not be called statically in /home/noahjames7/public_html/modules/mod_flexi_customcode/tmpl/default.php on line 54
Find out more by searching for it!
