Strict Standards: Only variables should be assigned by reference in /home/noahjames7/public_html/modules/mod_flexi_customcode/tmpl/default.php on line 24
Strict Standards: Non-static method modFlexiCustomCode::parsePHPviaFile() should not be called statically in /home/noahjames7/public_html/modules/mod_flexi_customcode/tmpl/default.php on line 54
Strict Standards: Only variables should be assigned by reference in /home/noahjames7/public_html/components/com_grid/GridBuilder.php on line 29
When it comes to removing objects in your pictures, nothing (yet) beats the power of Adobe Photoshop CC. If you’ve got plenty of background pixels surrounding the thing you want to zap, you can quickly send it packin’ with the Fill command’s Content-Aware option. But what if you need to use another area of your photo for the fix instead of surrounding pixels? That’s where the Patch tool shines. In this column, you’ll learn how to use both options safely, without destroying your original image. (As of this writing, Photoshop Elements’ Fill command has a content-aware option, but it lacks a Patch tool.)
Removing objects with Content-Aware Fill
Open an image with a medium-to-large sized object to delete, like this light post. To ensure you’ve got plenty of background pixels for Photoshop to work with, do the pixel-zapping before cropping. If you’re working with a single-layered document, duplicate the layer by pressing Command-J. If you have multiple layers, activate the topmost layer and create a stamped copy of all visible layers by pressing Shift-Option-Command-E.
Now select the object you want to delete. If there’s a lot of free space around it, you can use the Rectangular Marquee or Lasso tool to draw a selection around the object. Since that’ll rarely be the case, let’s try the Quick Selection tool, which creates a selection based on the color of pixels you click or drag across. After grabbing the tool, trot up to the Options bar and turn on Auto Enhance for a slightly smoother and more accurate selection.
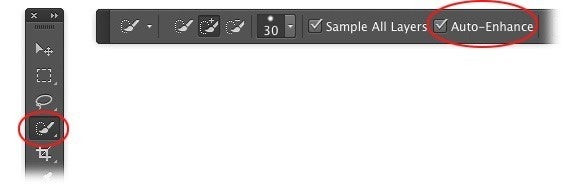
You can also activate the Quick Selection tool by holding down the Shift key and tapping the W key on your keyboard until you see its icon in the Tools panel.
Mouse over to your image and drag atop the light post to select it. As you drag, Photoshop adds similarly colored pixels to the selection, though the quantity of pixels selected is directly proportionate to the size of the tool’s brush cursor. For this image, use a larger brush for the lights (30 pixels) and a smaller one for the pole (9 pixels). If you accidentally select too much of the background, Option-drag across those pixels to subtract them from your selection.
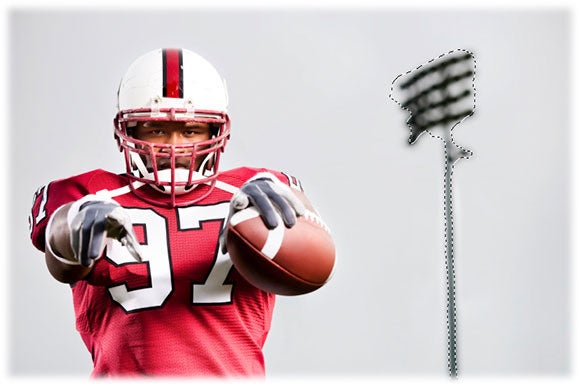
If there’s decent contrast between the object and its background, the Quick Selection tool works well.
To ensure you’re not left with a ghostly outline of the object when you remove it, expand the selection to include some background pixels by choosing Select > Modify > Expand.
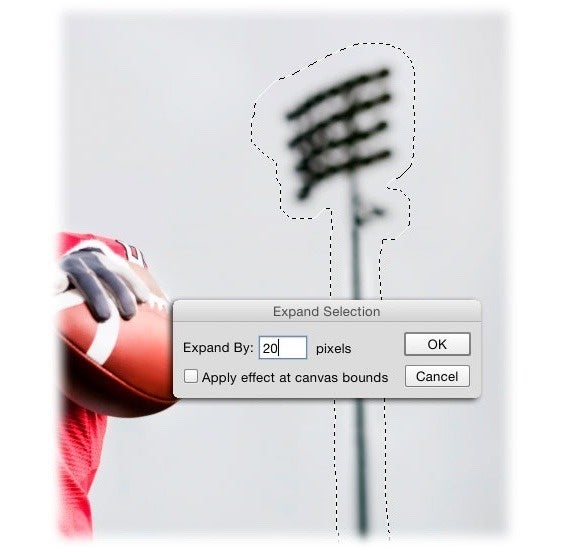
If you’re working with a small image, try entering a number between 8 and 20 pixels into the Expand Selection dialog; use a higher number on bigger images.
Choose Edit > Fill and in the resulting dialog box, choose Content Aware from the Contents menu. When you click OK, Photoshop fills the selection with surrounding pixels and blends them together. The voodoo used to fill your selection is random and changes each time you use the command. So, if you don’t like the results, try choosing Edit > Fill again. When you’re finished, press Command-D to deselect.

Here’s the final result, with plenty of room for text.
Removing objects with the Patch tool
If the object you want to delete isn’t surrounded by a slew of free background pixels, you can use the Patch tool to tell Photoshop to use an entirely different area of your photo for the removal.
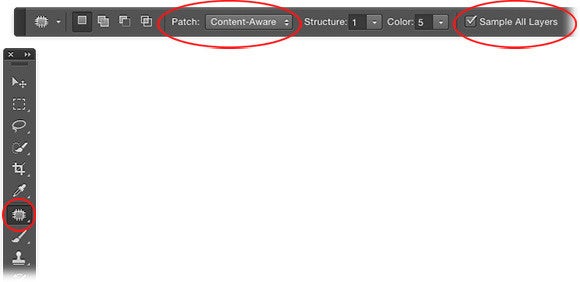
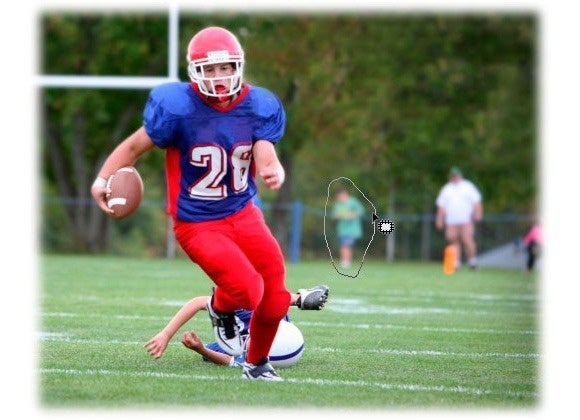
Start by pressing Shift-Command-N to create a new empty layer onto which we’ll do the patching. In the resulting dialog box, name the new layer something meaningful and click OK. Grab the Patch tool (it’s in the healing toolset) and, in the Options bar, choose Content-Aware from the Patch menu and turn on Sample All Layers. Don’t worry about the Structure and Color fields yet.
To activate the Patch tool, you can press Shift-U until you see its icon appear in the Tools panel.
Click and drag to freehand draw a loose selection around the person in the green shirt (let’s call this the target area). If necessary, expand the selection to include more background pixels, by choosing Select > Modify > Expand.
Technically, you can use any tool to select the object and then switch to the Patch tool. If you use the Quick Selection tool and you’ve already created the empty layer, turn on the tool’s Sample All Layers checkbox in the Options bar so Photoshop can see through the empty layer to where pixels live on layers below.
Next, click inside the selection and drag it to the area you want to use for the fix, like the left side of this image (let’s call this the source area). Photoshop shows you a preview of what the fix will look like as you drag. Release your mouse button and Photoshop performs the patch.
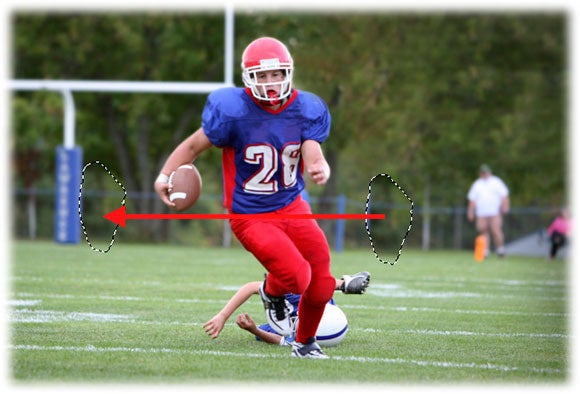
Try to match any horizontal or vertical lines as best you can before releasing your mouse button.
Before you get rid of the selection, use the Structure and Color fields to enter precise settings for more realistic blending. Use Structure to determine how much detail blending Photoshop performs in the target area from a lot (1) to not very much (7). The Color field lets you specify how much color blending occurs, from none (0) to tons (10). When you’re satisfied, press Command-D to deselect.
Repeat these steps to remove the other people in the background. Be sure to perform each removal on a new layer for maximum editing flexibility, and experiment with using areas on the left side of the image for the removal. If necessary, use the Clone Stamp, Spot Healing, or Healing brush for cleanup. Be sure to use those tools on new, empty layers, and turn on their Sample All Layers settings in the Options bar so they’ll function on empty layers.
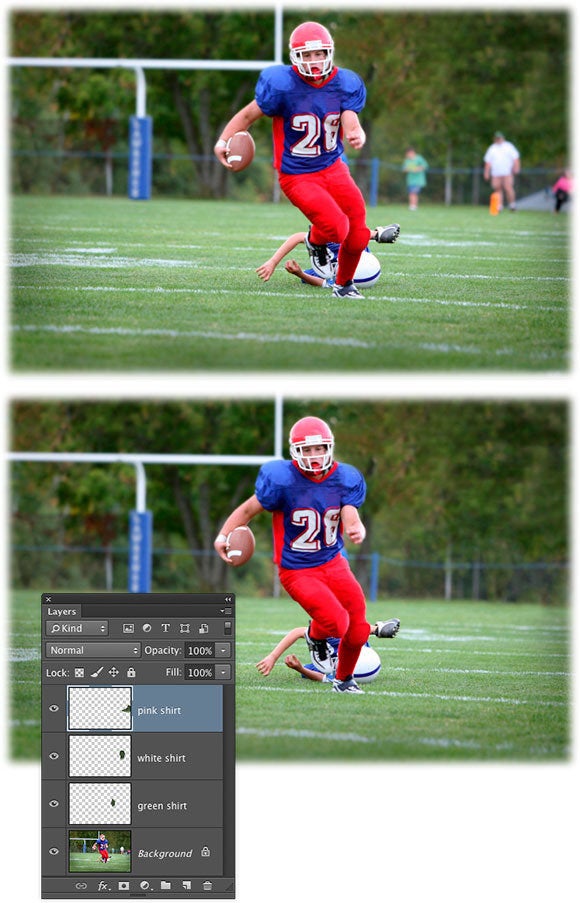
Here’s a before and after version of the image.
As you can see, Photoshop did a remarkable job of removing the people from the background, creating a less distracting background. Until next time, may the creative force be with you all!
Strict Standards: Only variables should be assigned by reference in /home/noahjames7/public_html/modules/mod_flexi_customcode/tmpl/default.php on line 24
Strict Standards: Non-static method modFlexiCustomCode::parsePHPviaFile() should not be called statically in /home/noahjames7/public_html/modules/mod_flexi_customcode/tmpl/default.php on line 54
Find out more by searching for it!

Custom Search